
Sorting through all those Maui photos I suddenly realized the light there is just great and the lushes nature scene colors every photos in vibrant, live colors.
Until next Friday, stay healthy and Happy, seize the day and keep scrapping!





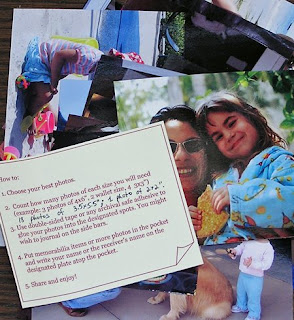
In every album I produce, I make sure to affix a 'How to' instruction card. You can follow the easy, step by step directions to get a complete, gorgeous scrapbook photo album. First step is to find the photos you want in that album, photos that will tell that specific story. You may choose to print different photos in different sizes, so you can fit more photos or create a 'spot light' on one single photo by printing it larger, making it the focal point of your story.
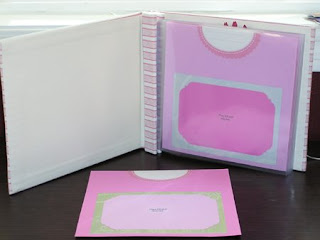
Choose a premade scrapbook album that fits your needs. If the colors of most of your photos are very vibrant and colorful (often happens with children's photos), better go with a subtle, multi hue color scheme, or a 3 color scheme that fits most, if not all, your photos. Also take note of journaling space if you're about to add that - where and how many words would fit?
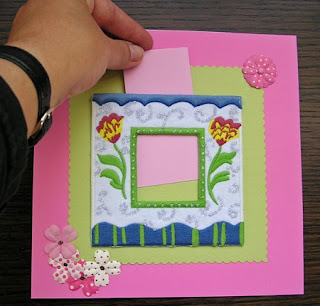
In many of My Treasure Box albums we add photo frames you can use. Measure the inside of the window and see which one of your photos would fit best, both size-wise and location(where in the album is it? Does your photo fits front page? middle? last page? Is the size right for that photo?

As you can see, I chose to use Gaby's first brushing session for the window in Gaby's first years album. The focus is on Gaby and her tooth brush, and since it was taken at night, from afar, the small size is just right for this photo. In addition, the vibrant colors of the frame, matting and embellishments work well with the skin tones in the photo.
 Some photos fit straight and nice, some need a little twist. Donald enjoyed the brushing and grooming as much as Gaby did!
Have a great weekend and keep happy!
 1. Choose photos. Not every photo you took has to wind up in an album. You may choose to place photos in your album by theme (holidays, the great outdoors, vacations we took); timeline (infancy, early childhood, grade school, middle and high school, higher ed., professional life); milestones in one’s life (birth, growing up, achievements, family); repeating subject (Christmas throughout the years, our Hanukkah traditions), etc.
  Here I chose 8 photos that tell my story. There are still too many of them and I know already they won't fit into my layout, so I ordered them in the order of the story to look for duplicates or unnecessary photos. Those will eventually come out and I'll be left with only the most important photos, the ones that 'move the plot'.
 On the left are the photos paired with the various materials I'll use the make the final layout. I chose 'earthy', natural papers as the scene is our visit to the farm.
4. Use color to emphasize your photo. Use the color of attention in the photo - in your layout. Or, if the layout is very colorful, consider presenting the photo in black and white or sepia tones. In this case I used red for background as my daughter is weaing, and dark green to match my son's coat.
5. Use shape to focus. By repeating the same shape or angle in your photo, you will help viewers focus on the goings-on of the photo. 
Here the bars of the cow's habitat are repeat in the corrugated cardboard to the left, the hey shapes are repeated on the background paper on the right and the roundness of the cow, plus the cow's eyes are repeated with the bicycle wheels and the matting patterned paper of the cow's photo, as well as the 'farming' title to the right.
Materials credits: Background cardstock 'birthday' by MME; dotted cardstock princess by MME; Glitter cardstock by DCWV; Sticker letters by Memories Complete;Font: Calibri.
 Choose your photo album cover design in accordance with the purpose of the photo album and the personality of its owner (example: school days - in the photo to the left, baby theme, photo in window or embellished cover).

 your photos from discoloring and use sheet protectors so viewers can point at their favorite photo without leaving their fingerprint on it. If your theme or subject is a growing/developing one (school years, baby, holidays through the years), start with an album that can expand later. Good luck!
 Posts
All Comments
Posts
All Comments


